How to Keep Formatting When Converting to DocuSign
- George Apostolov
- 05 Sep 2025
Guide
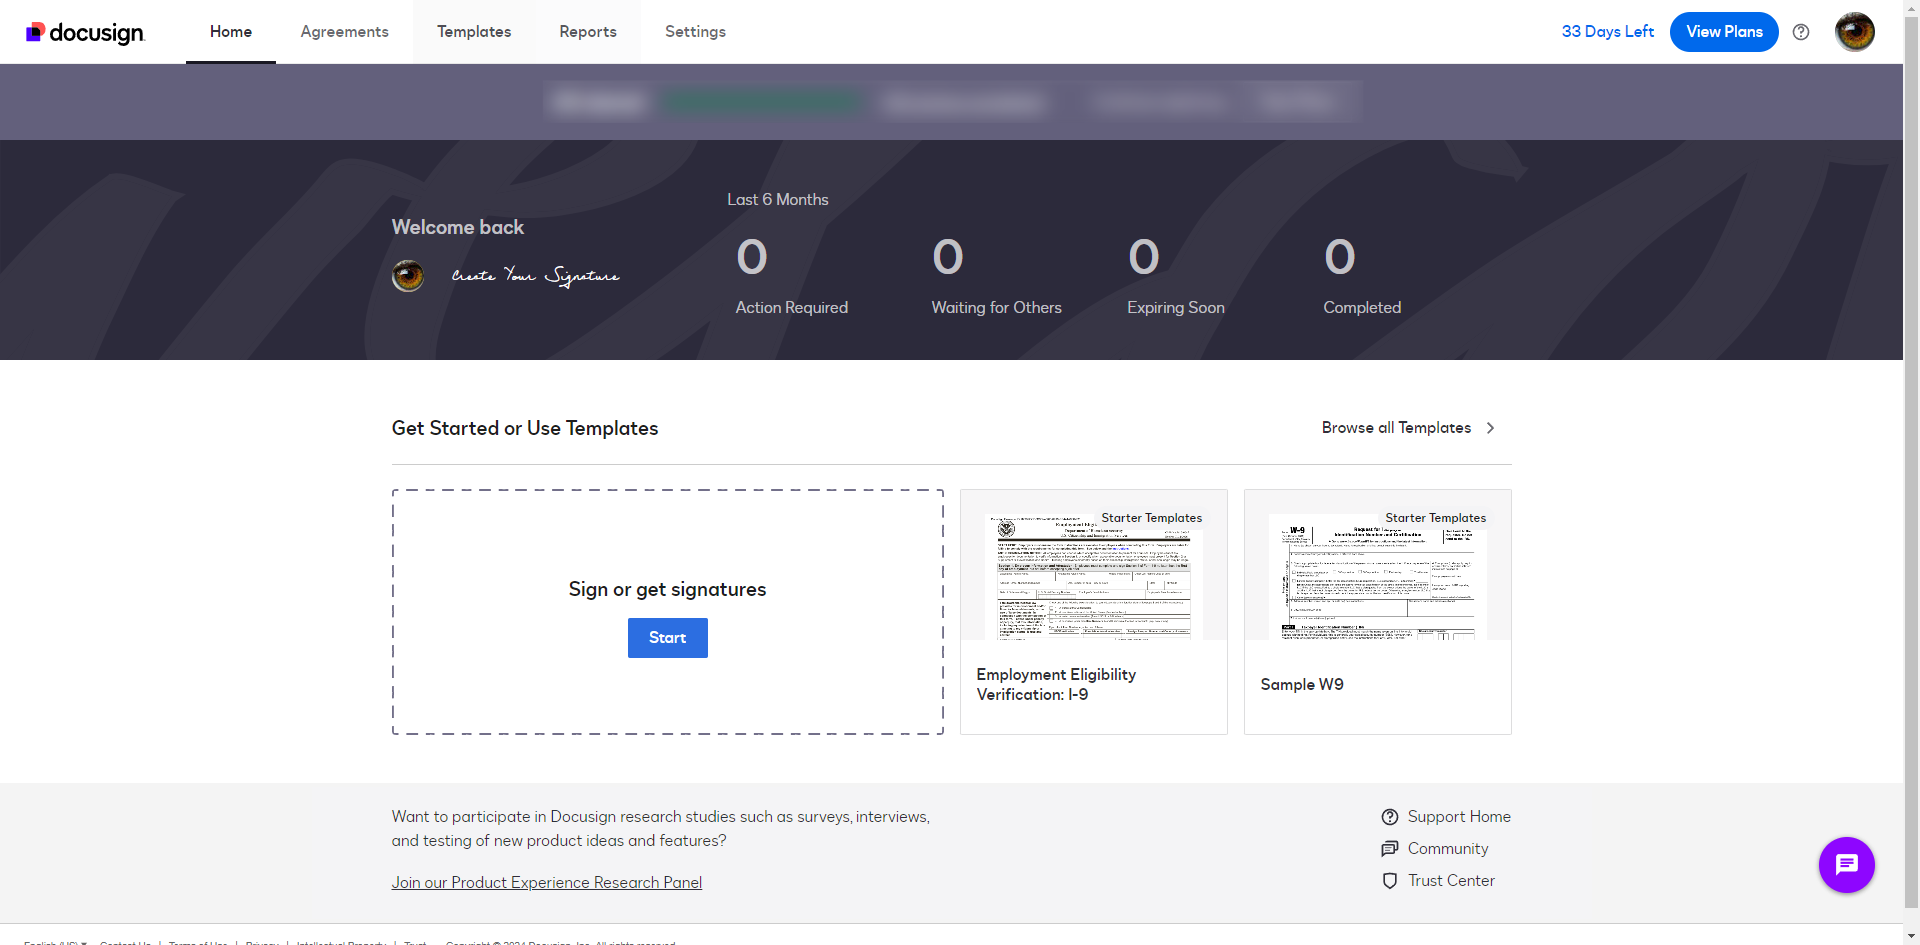
Click ‘Start' to add a new document.
Click 'Upload' and select the document you want to send. Ensure the file you upload is the final version with the correct formatting.
Click the vertical ellipsis.
Select 'View Document'.
Review your document to make sure it’s formatted correctly and ensure your document is in a format that DocuSign supports, such as PDF, Word (DOC/DOCX), or other standard file types.
Enter the email addresses of the people who need to sign the document.
Click 'Next' to enter the document editor.
Drag and drop signature and other necessary fields onto the document. Be careful to place fields without altering the document layout.
Click the 'Preview' option to review how the document looks with the fields added. This helps you ensure the formatting is intact.
PDFs are less likely to have formatting issues compared to Word or other formats. Convert your document to PDF before uploading to DocuSign if it isn’t already.
Click 'Formatting'.
Use standard fonts that are more likely to be preserved when converting to PDF and uploading to DocuSign.
Once you're done, click 'Send'.
By following these steps, you can ensure that your document’s formatting remains consistent when converted and sent through DocuSign.
Create your first interactive demo in minutes
No credit card required • Start building today